|
Tutorial 1: Step 1 Start GeneLinkerô and Import the Data
Start GeneLinkerô
1. Double-click the GeneLinkerô
program icon ![]() on your desktop to start the application.
on your desktop to start the application.
See GeneLinker Tour - Main Window Layout for a brief introduction to the GeneLinkerô program window.
In the upper left pane (navigator), you will see three tabs: Genes, Gene Lists and Experiments. They give you three views of the data in the GeneLinkerô database. Clicking a tab brings that view to the front.
Import the Gene Expression Data
1. Click the Experiments tab to display the Experiments navigator. All datasets and experiments present in the database are listed here in a hierarchical tree.
2. If the dataset Spinal_cord is present, skip the rest of this step and continue with step 2 - View and Normalize the Data.
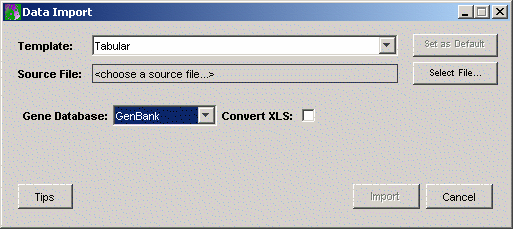
3. Click the Import
Gene Expression Data toolbar icon ![]() (far left on
toolbar - to discover what function an icon invokes, hover the mouse pointer
over it for a couple of seconds. A tooltip is displayed naming the function),
or select Import from the File menu and Gene
Expression Data from the sub menu. The Data
Import dialog is displayed.
(far left on
toolbar - to discover what function an icon invokes, hover the mouse pointer
over it for a couple of seconds. A tooltip is displayed naming the function),
or select Import from the File menu and Gene
Expression Data from the sub menu. The Data
Import dialog is displayed.

4. GeneLinkerô uses a template to interpret or parse the data values as they are read in from the data file. The installed default for the template is Tabular. If the Template listed on the Data Import dialog is NOT Tabular, click the Template Change button. This displays the Import Templates dialog. Click Tabular and click Select. The Data Import dialog is updated showing Tabular as the template.
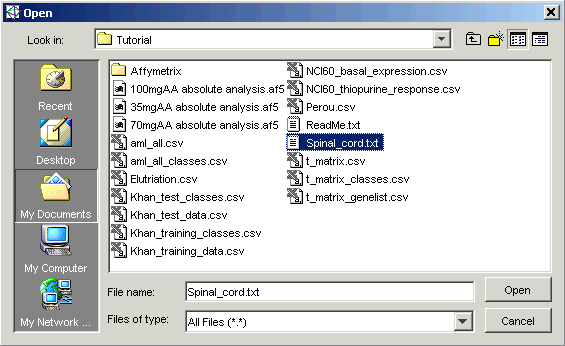
5. You now have to tell GeneLinkerô where the data file is located. Click the Source File Change button. The Open dialog is displayed.

6. Navigate to the GeneLinkerô Tutorial folder (if necessary) and click the file Spinal_cord.txt. The file is highlighted.
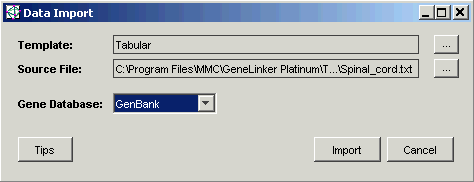
7. Click Open. The Data Import dialog is updated with the source file.

8. Ensure that the Gene Database is set to GenBank (use the drop-down list to choose GenBank if necessary). If you import a file that has gene identifiers other than GenBank, set the Gene Database to match your data. For the Spinal_cord dataset, GenBank is correct.
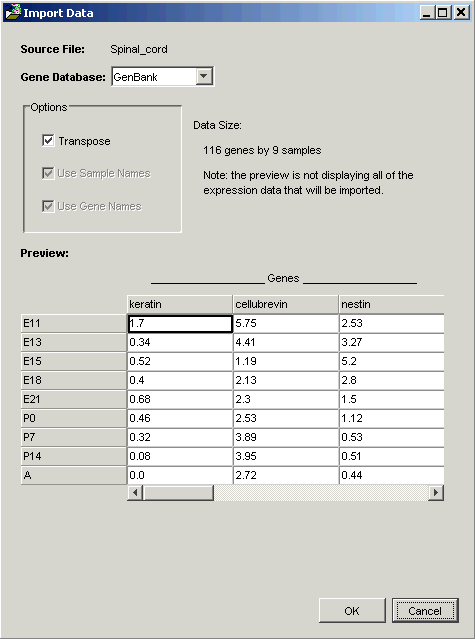
9. Click Import. The Import Data dialog is displayed.

GeneLinkerô examines the file and offers to transpose it. Within GeneLinkerô, datasets have the genes in columns and the samples in rows.
When importing data using a Tabular template, GeneLinkerô assumes that the more numerous dimension of your data represents genes (most microarray experiments involve more genes than samples). If this is so (as in this tutorial), then clicking OK is all that is required.
Note: the options Use Sample Names and Use Gene Names are checked and disabled in the Import Data dialog box. GeneLinkerô has recognized that in this dataset, the first row and column contain alphameric labels. Gene expression data is always numeric, hence the disabled checkboxes.
10. Click OK. The data is imported and an item named Spinal_cord is added to the Experiments navigator. This represents your raw data, which is now available to perform experiments on using the various GeneLinkerô functions.
Note: when a dataset is imported, it is assigned a unique name. If the incoming dataset has the same name as an existing one, it is renamed automatically by the program (a numeric identifier is appended to the original name). For example, if you import Spinal_cord.txt again, it will be assigned the name Spinal_cord 1.

